Smartphone cameras have a problem: the image sensors are extremely small. At night, it is especially difficult to have sufficient light for a nice photo, which often makes your pics blurry of full of noise. We’ll show you a few tips and tricks on how you can shoot good photos in the dark.
Shortcuts:
For starters, here's some background on physical and technical aspects of why taking a photo in the dark is so difficult. As I already mentioned in the intro: size is the problem. The light-sensitive area in most sensors that are integrated into smartphones is roughly 15 to 30 mm². In comparison: Full-format image sensors from our editor’s DSLR camera have an area of roughly 860 mm² – that is 30 to 60 times more.
While small smartphone sensors can gather enough light during the day, the chip simply receives too few photons in the dark. However, there are now several ways to take bright pictures with your phone, although each has its pros and cons.

We've had night modes in cameras phone apps for a while, but to be honest, they have never really made that much difference to the end result. Google's Pixel 3 and 3XL marked a massive shift in the goalposts last year with a new Night Sight mode, with the results shown below:
Night Sight takes multiple exposures and then combines them to create a better result and reduce noise in the photo.
Huawei has a similar Night Mode, and but it's only with the flagships, the Huawei P30 and P30 Pro, that we've seen it get even better than Google's Night Sight. If you have a relatively new smartphone with a night shooting mode, it's worth giving it a try. But if your smartphone is older, it's time to rely on the tried-and-true techniques below:
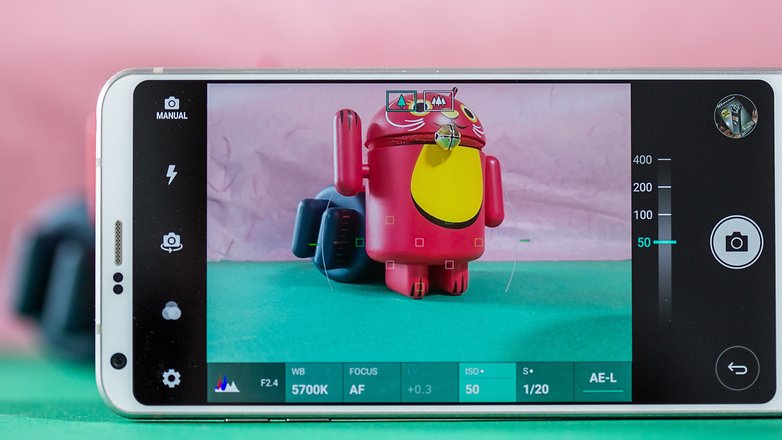
Whether you’ve tinkered around with ISO values before or not: you must have encountered the term at some point. To produce a bright picture in low light using a small sensor, you can simply amplify the image sensor’s light sensitivity. The camera app does this by itself when taking pictures in automatic mode.
However, greater ISO sensitivity also produces greater read errors that manifest themselves as image noise, loss of detail and washed-out colors, among other things. In short: the pictures are indeed bright and mostly sharp, but they're not really presentable most of the time.
If your smartphone doesn't let you manually adjust ISO sensitivity, there are different apps you can use instead. Camera FV-5 Lite (Android) or Pro Camera (Apple), for instance, offer numerous settings options. Unlike the iPhone, however, most Android smartphones and their camera apps offer numerous manual options.
More light is required to keep the sensor sensitivity low (and hence reduce image noise). As silly as it may sound, this can be achieved by adding sources of light to the subject. The smartphone’s integrated photo LED is always available here. Many modern phones even have several LEDs to adjust the flash’s light color to the environmental lighting. It's quite effective at preventing color casts and the images look decent.
However, these integrated camera LEDs also have their drawbacks. The flash from the camera’s line of sight eliminates all shadows – often making the subject look very two-dimensional and even “flat”. Therefore, the integrated flash should only be used when absolutely necessary.
In most cases, however, there are other options to ensure more light. If you take a picture of a moving object, then the location changes. When taking a portrait, take a few steps over to the nearest street lamp, or to a brighter corner of the bar. Take steps to ensure that light does not come directly from above to the greatest extent possible, since that casts awful-looking shadows on the face.
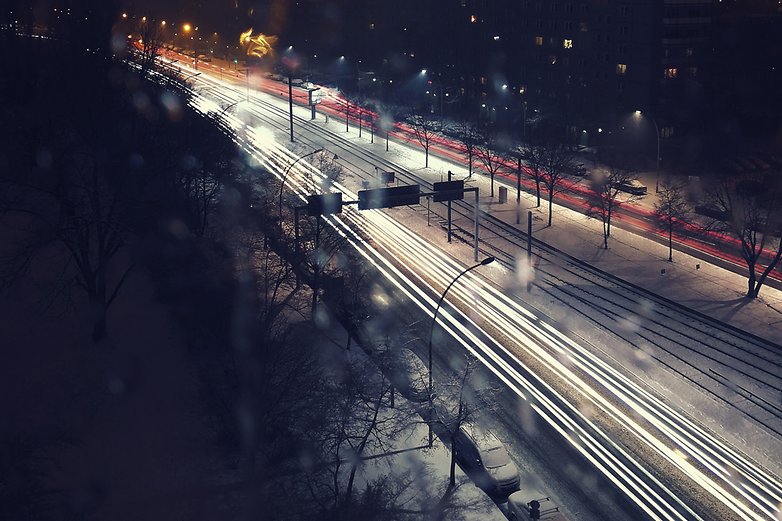
If you can no longer add any light to the subject, then you must give your smartphone more time. A longer exposure time lets the image sensor “see” the subject longer and gather more photons. As well as brighter photos, it also has an additional effect: Anything that moves is blurry. In the worst-case scenario, it causes blurry shots, but it also for example, turns passing cars into long trails of light.
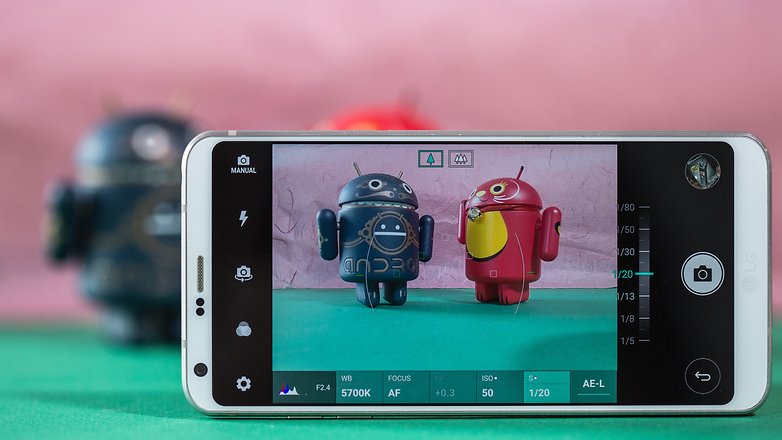
To increase the exposure time, you need the manual mode, often called “pro mode” or something similar. This questionable option is called shutter speed, exposure time or is simply and poignantly abbreviated with “S”. Most smartphones in automatic mode take pictures at a maximum speed of 1/10 second – longer exposure times require you to keep your hand very very still or else the shots will come out blurry.
Passing trams and cars or fireworks in the sky turn into beautiful traces of light at two to eight seconds. To depict a landscape illuminated by the moon, you may need to use a 30-second exposure time, which is the maximum in many camera apps. If the images turn out too bright at longer exposure times, you must ensure that the ISO sensitivity is set to “automatic” or to a low value. If that doesn’t help, then the subject is quite simply too bright and you need to correct it by decreasing the exposure time.
Of course, for long exposure times, it's extremely important that the smartphone does not move during the shot. To do this, you can either fix or lean your phone on something, or use an accessory, which brings us to our next point.
Anyone who finds nighttime photography fun and regularly takes shots in the dark should probably consider one accessory: a tripod. Since smartphones are light and compact compared to full-fledged cameras, the same applies to the tripod as well. For instance, you can obtain a small Gorillapod for less than $15, or you can get the Gorillapod and a corresponding smartphone universal adaptor for $20. Both objects fit comfortably in your jacket pocket and are ready to use in a few seconds.

Some smartphones, like the older Sony Xperia models and the Razer Phone and Razer Phone 2 have flat bottoms, so they can sit on their sides without requiring extra accessories for long exposure times.
You can choose between many different accessories to take beautiful pictures, even in poor lighting conditions. As is generally the case when it comes to photography, I can only give you one piece of advice: take the time to try different things out. Familiarize yourself with your camera app’s settings. And above all, take many, many pictures, because photography itself - not reading articles like this one - will do the most to make you a better photographer.
Read More Open link https://ift.tt/2tzDmpW
0 Response to "A shot in the dark: tips for taking better night photos with your phone"
Posting Komentar